
Meetings are considered one of the most important commonly occurring business interactions conducted between colleagues, clients, and customers. Microsoft Teams increases the efficiency of these interactions with advanced, collaboration-friendly features. To schedule and host an online meeting is an easy feat. However, in this blog, we will teach you how to record a meeting so users can view them at a later time.
At Dock, we conduct all of our meetings through Microsoft Teams. Our colleagues often experience difficulty in taking sufficient notes during fast-paced meetings. Availability of employees poses an additional challenge for online meetings. We have found that recording meetings supports our team so they can process information and ideas shared within meetings better with the ability to pause a rewatch sections of a discussion.
We have previously discussed how to effectively run a Teams meeting. Now we'll walk you through how to easily record a Teams meeting.
Tutorial: How to Record a Microsoft Teams Meeting
Complete the following steps to record a Microsoft Teams meeting:
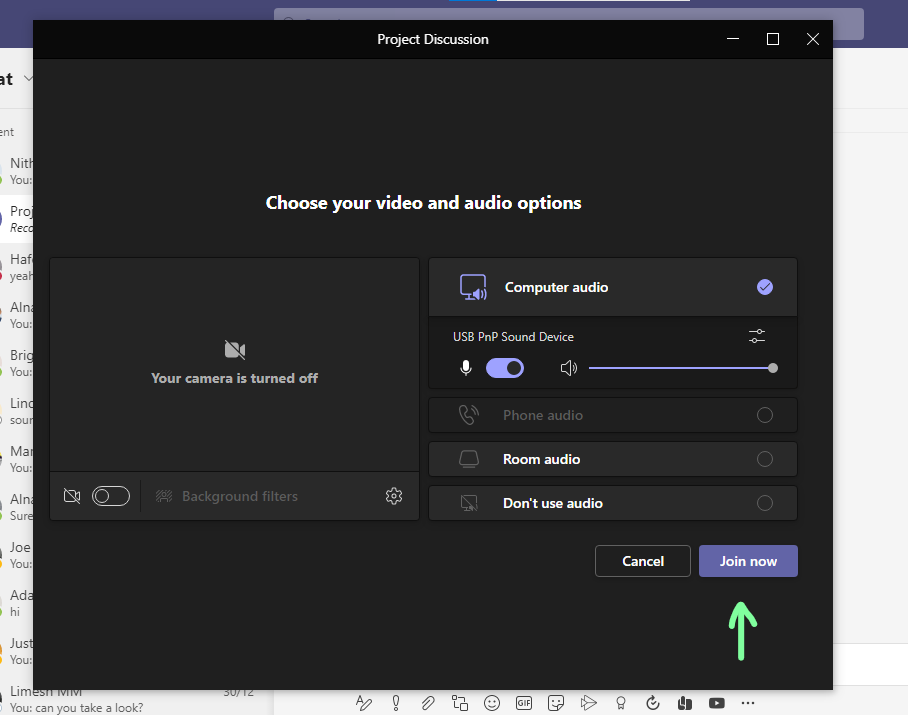
- Click Join now to join the meeting. Select the scheduled meeting event within your calendar to locate this option.
- After entering the meeting, add the desired users by clicking the participants icon located at the top.
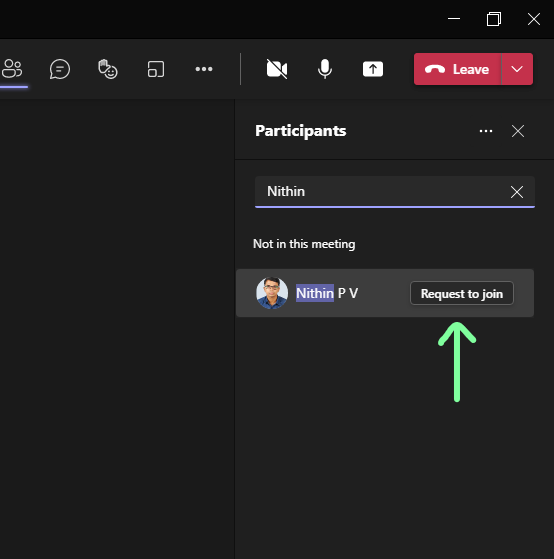
- Enter the user’s name and click Request to join to invite the user to the meeting.
- After everything is appropriately configured for a successful start to your meeting, click the ellipses, then click Start recording.
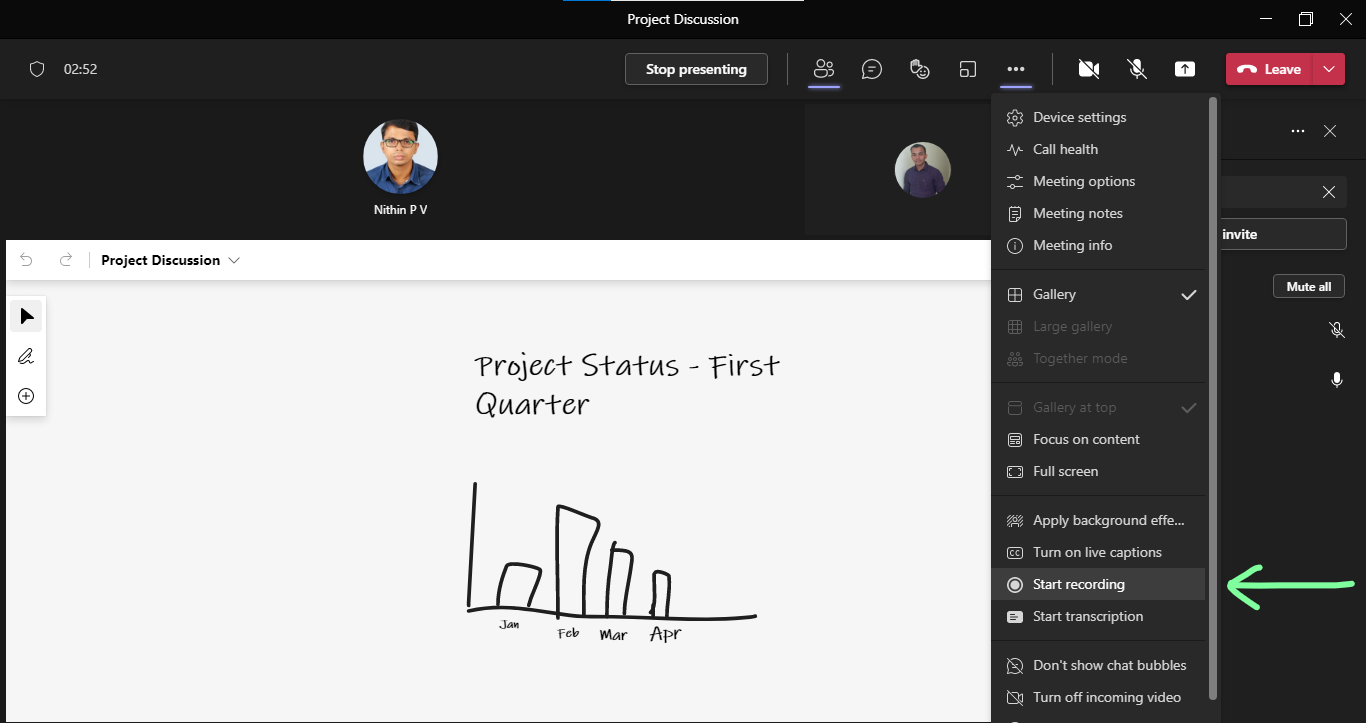
- You will see notifications confirming that the recording has started.
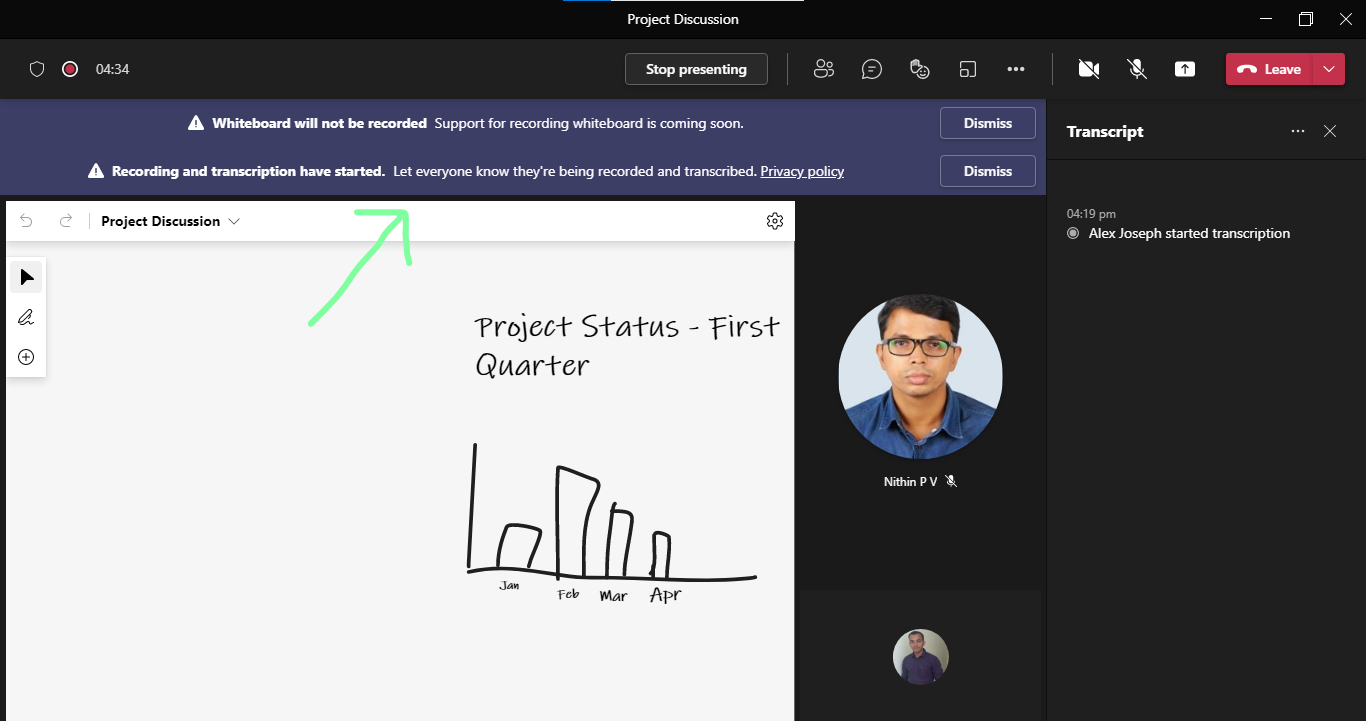
- In this tutorial example, we shared the Microsoft Whiteboard in the meeting. However, the Whiteboard will now not be recorded as described by the notifications.
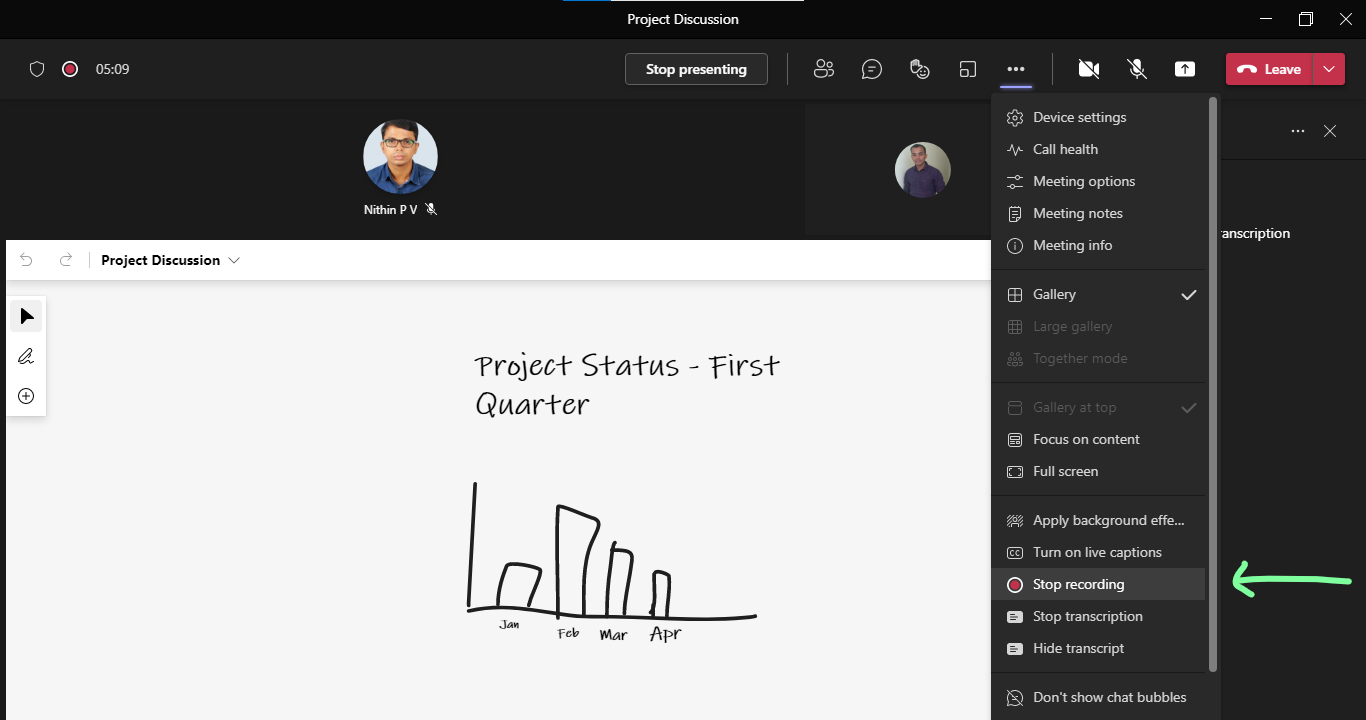
- Once the meeting is complete, click the ellipses, then click Stop recording.
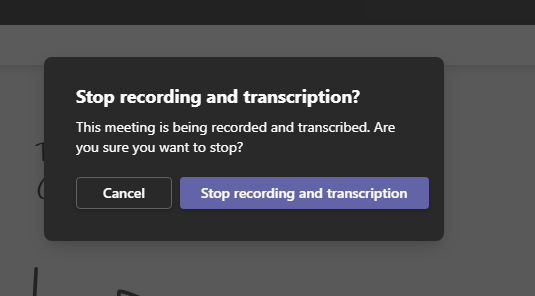
- Confirm your action by clicking Stop recording and transcription in the confirmation window.
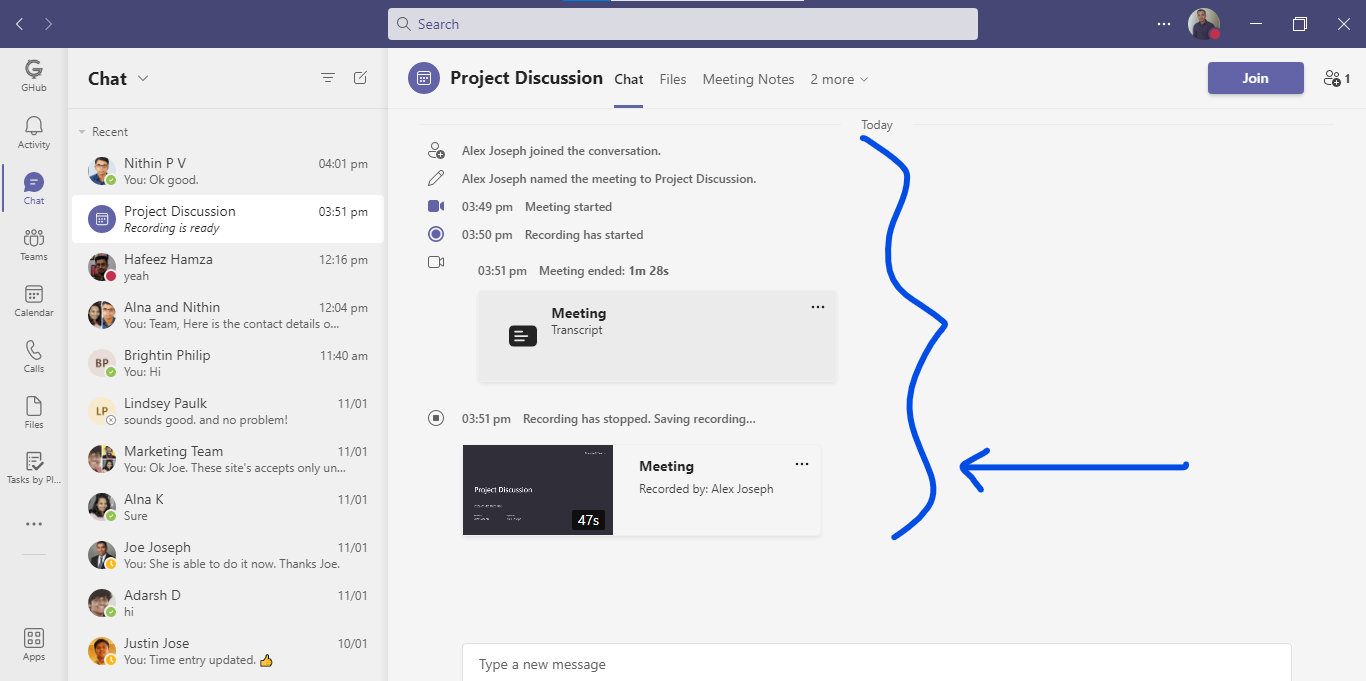
- Once the meeting ends, you will see a chat window like the one picture below that provides users access to all details regarding the meeting, including the recording.
How To Find and Manage Recorded Teams Meetings
After recording the meeting, you'll want to be able to easily access the recorded Teams meeting. Channel meetings are automatically saved to SharePoint, whereas other meetings are stored in OneDrive. After the meeting ends, the recorded video is accessible in the Teams channel or meeting Chat respectively.
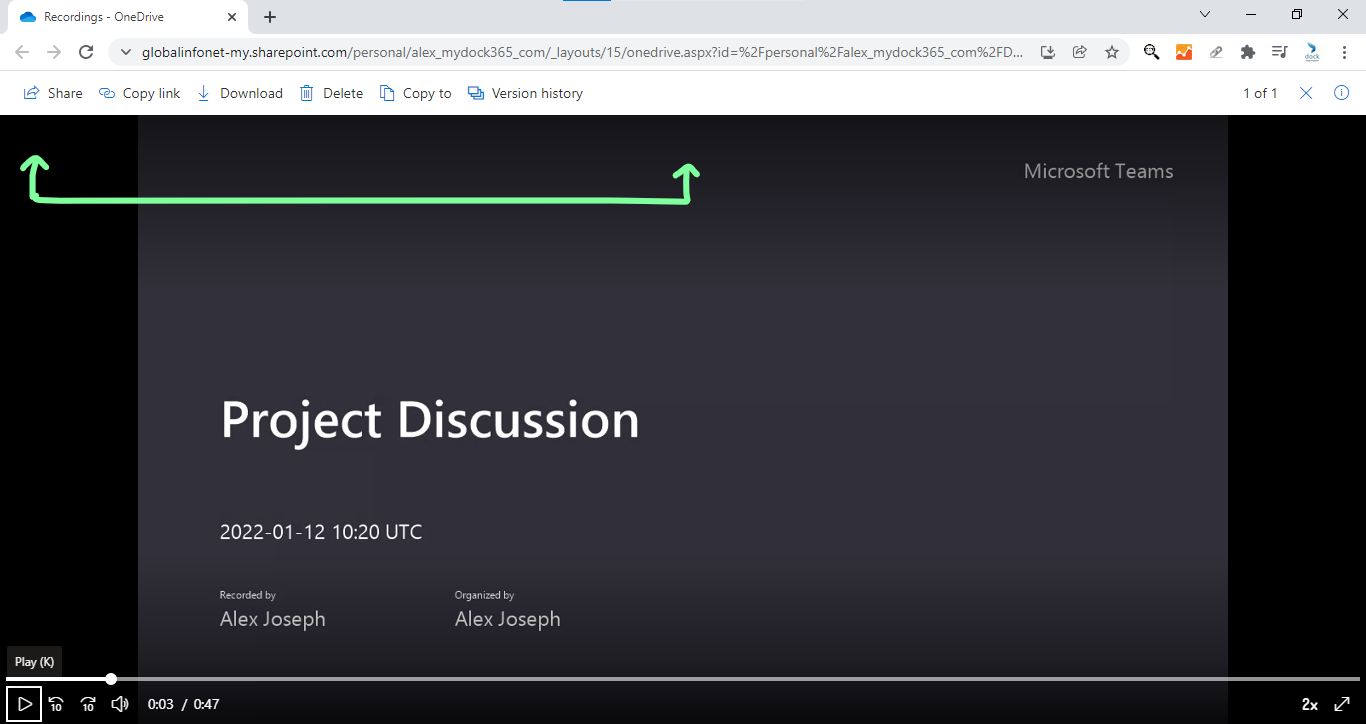
Simply click the video, then it will open in a separate browser tab. From there, you can watch the recording and use additional options including Share, Copy link, Download, Delete, Copy to, and Version history.
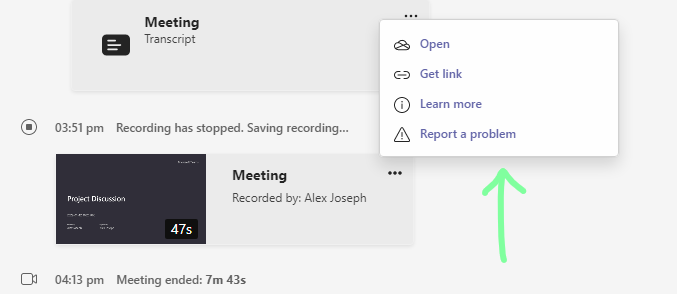
Click the ellipses next to the video to select the Get link option. This link allows users to copy the video's link so they can share the link with others.
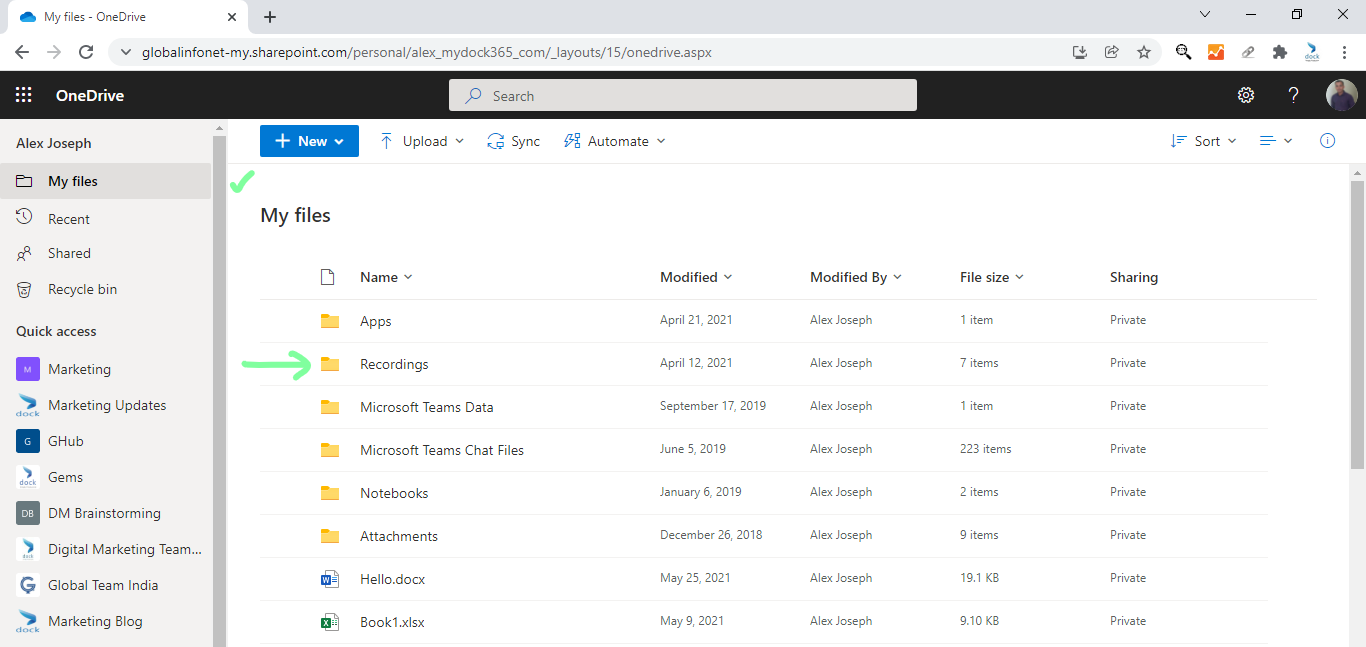
To find the list of video recordings in your OneDrive, open your OneDrive start page then click My Files on the left menu. Then select the Recordings folder.
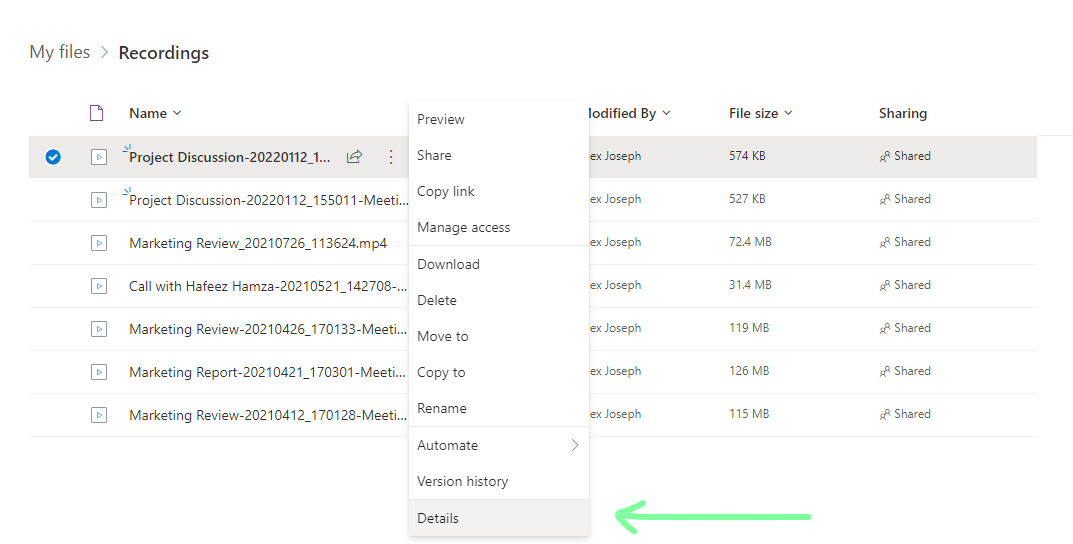
There you will be able to see all your recordings listed.
How To Manage Expiring Teams Recordings
Using admin settings, you can decide when recordings expire. If an expiration date is not set for recordings, then they will never expire. This option is great for freeing up storage space.
Complete the following steps to configure an expiration date for a recording:
- Go to the Recordings folder.
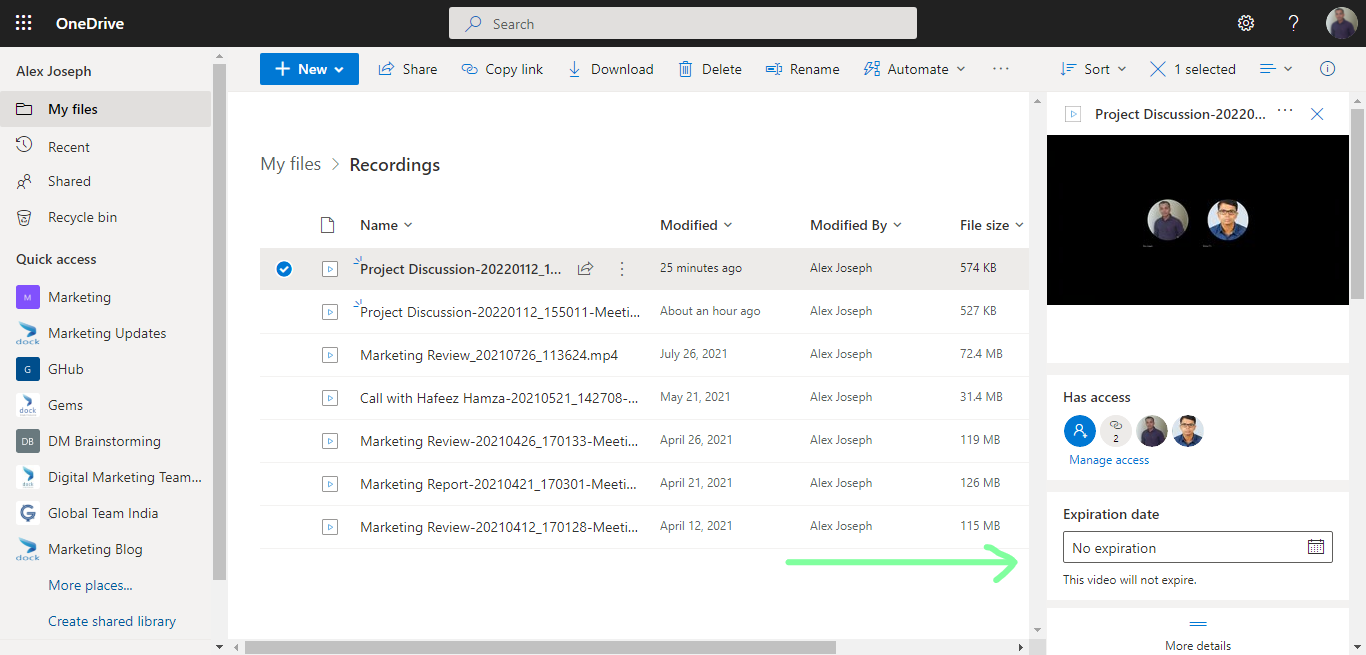
- Select the desired recording, click the ellipses next to the file name, then choose Details.
- The expiration date option is shown on the left pane that appears.
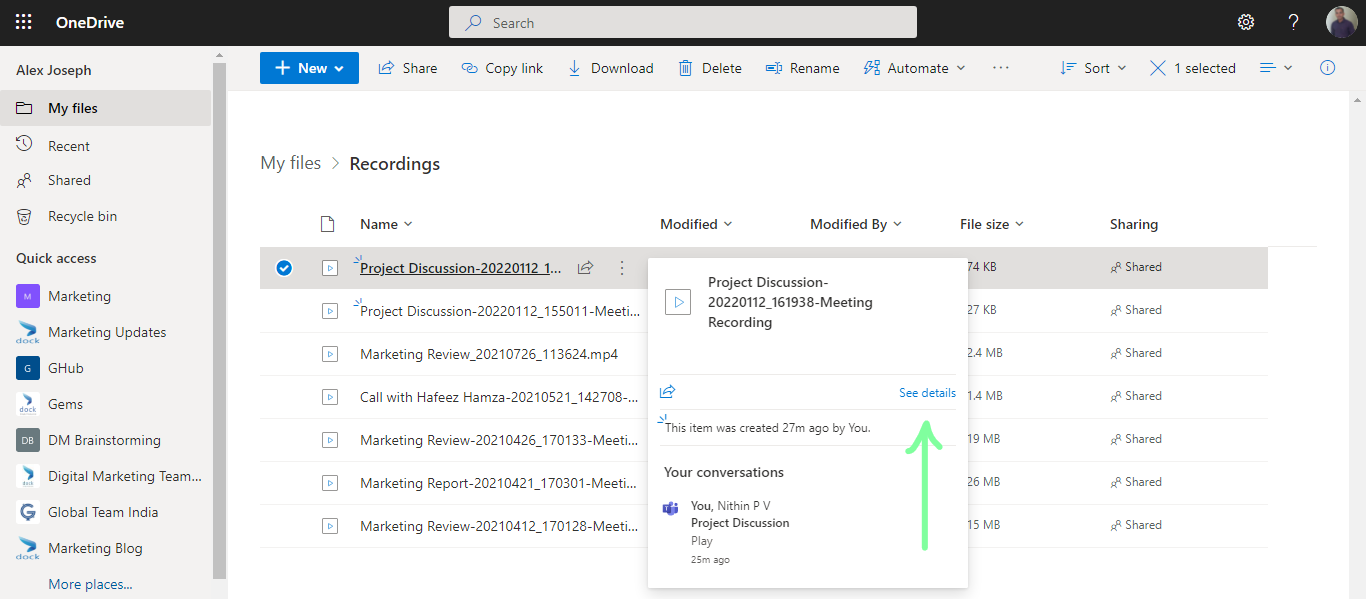
- You can also open the left pane by hovering over the desired recording file and clicking on the See details option on the pop-up.
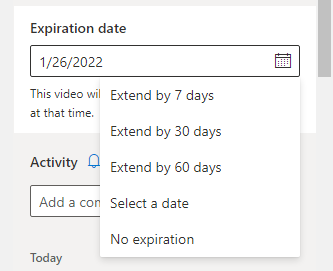
- Set the desired date of expiration by clicking the calendar icon.
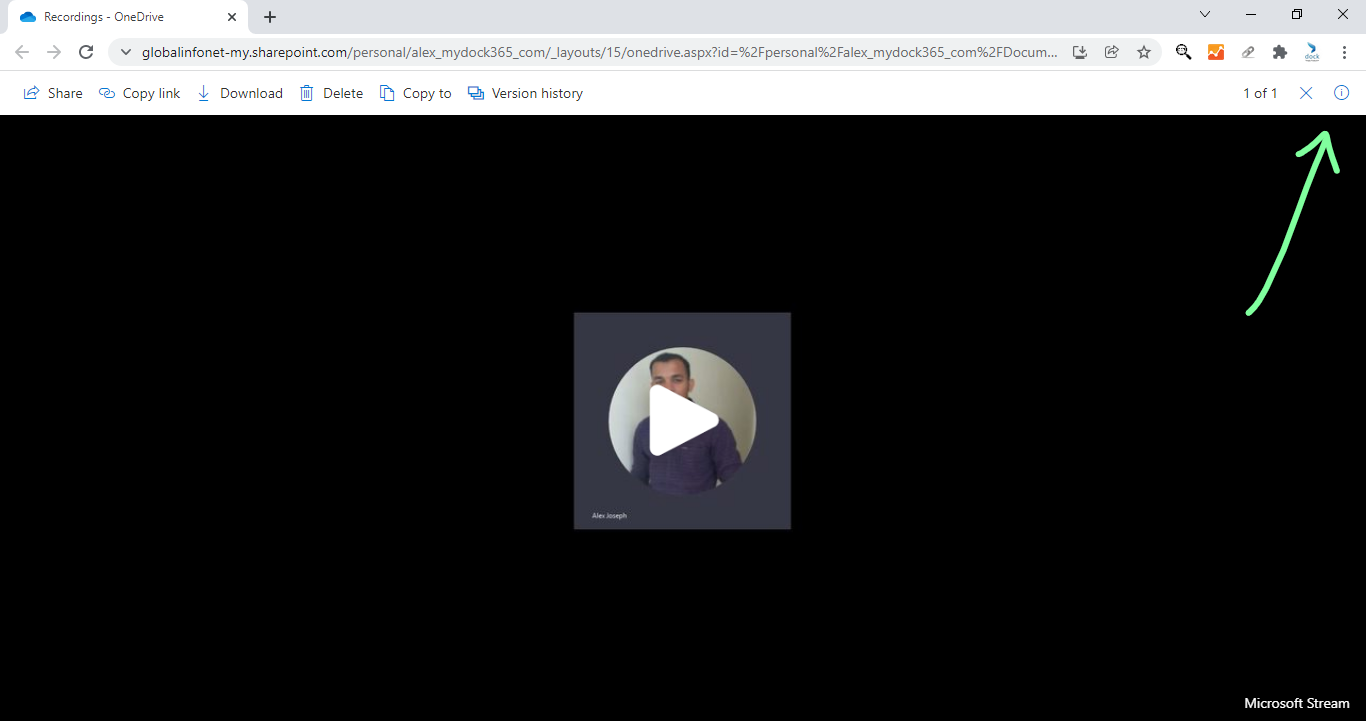
- You can also set the expiration date by clicking on the i icon displayed on the right corner of the video tab that opens after clicking the video recording link.
- You can even change the expiration date later by following the same steps.
Helpful Tips for Successful Recording
- Whiteboards and shared notes will not be captured in Teams meeting recordings.
- You will be able to see a maximum of 4 participants' video streams while viewing a meeting recording.
- Before, meeting recordings were saved on Microsoft Stream. Now, they are saved in OneDrive or SharePoint.
- When you begin recording, live transcription is also initiated.
- There are additional options for managing the live transcription facility.
Try out these options to record your meetings so you can easily review them later at your convenience. Let us know about your experience in the comments. Have a good day.