

The upgrade of SharePoint Online from Classic to Modern pages has certainly impressed us all. The added features, visual aesthetics, and advanced capabilities enhance the user experience. Microsoft has introduced SharePoint Spaces, an incredible innovation providing businesses the ability to showcase data and information in an immersive manner. In this blog, we will demonstrate how to create a SharePoint Space and discuss various factors that should be considered to create an excellent experience.
What is SharePoint Spaces?
SharePoint Spaces is a web-based platform presented by Microsoft SharePoint that provides users the opportunity to create an immersive user experience. With the help of this platform, you can create and share mixed reality experiences.
For example, you can use 2D and 3D web parts to give structure to your mixed reality ideas and vision. SharePoint Spaces is also a great addition to your organization’s intranet platform. While SharePoint Spaces and Modern SharePoint Sites share many characteristics, SharePoint Spaces has certain features that set it apart. When creating a SharePoint Space, users must first create the space, then customize the space by structure, background, and theme. With the assistance of web parts, users can add 3D objects, 2D images, 360° images & videos, text, and more.
How To Create A SharePoint Space
Creating a SharePoint Space is simple, you can either create a new Space or use an existing one. Even though you can create a Space in Team sites and Communication sites, we highly recommend creating them in Communication sites because you can use more Space in a Communication site, allowing you to create better SharePoint Spaces.
Let’s see the steps involved in the process.
- Go to the site you wish to create a Space.
- First, ensure that the Spaces feature is enabled.
- To do so, click Settings at the top, then choose Site content.
- Click View all settings.
- From the Site actions section, choose Manage site features.
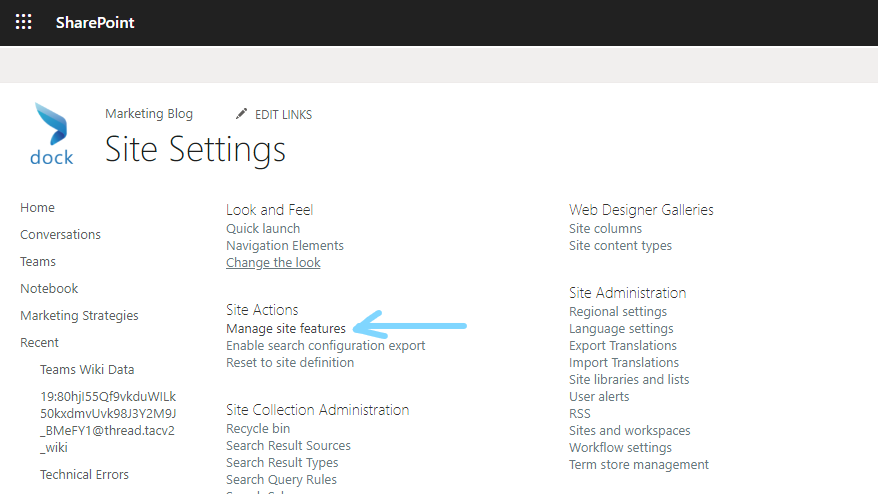
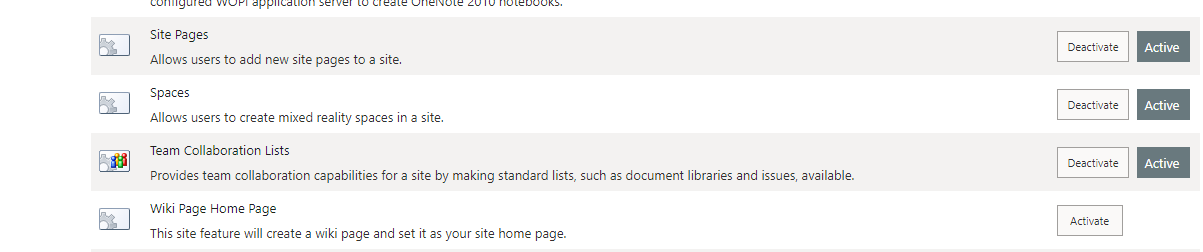
- Find the Spaces option at the bottom, then click Activate.
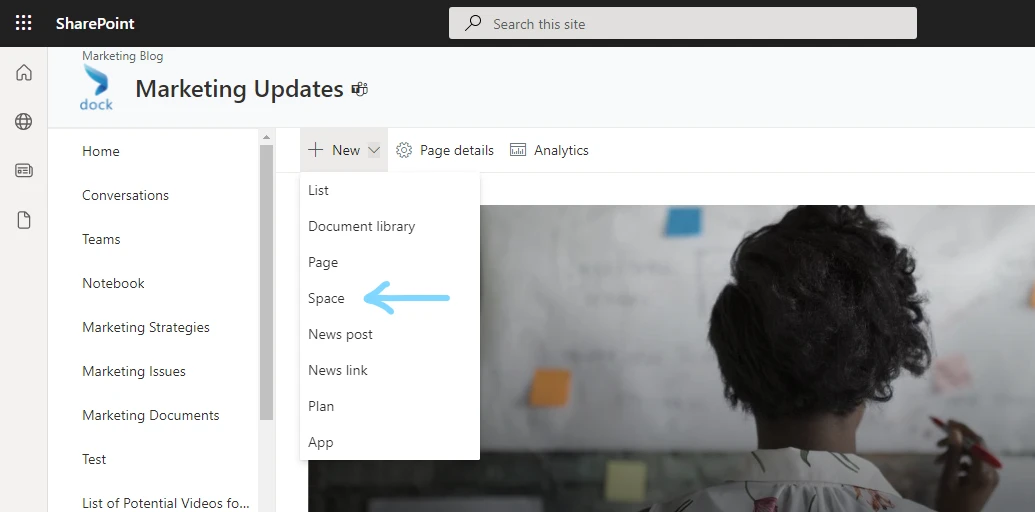
- Go back to the home page, click the + New option, and choose Space.
- Enter the name and description for the Space you are creating.
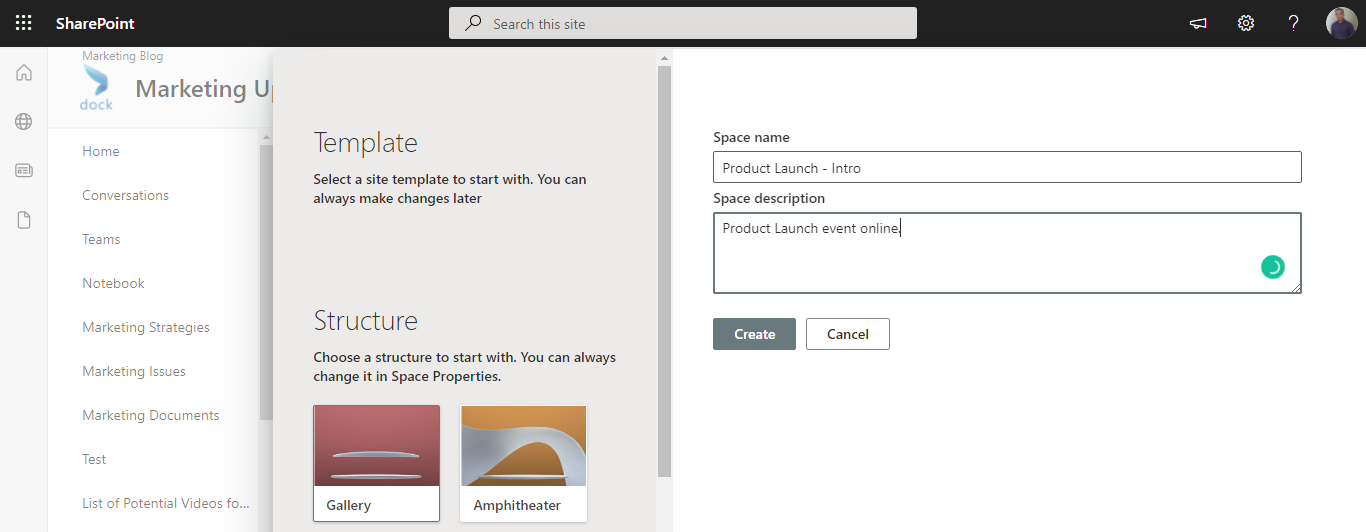
- You can also choose the structure of the Space from the window.
- Once you are finished configuring the Space, click Create.
- Your new Space will be created.
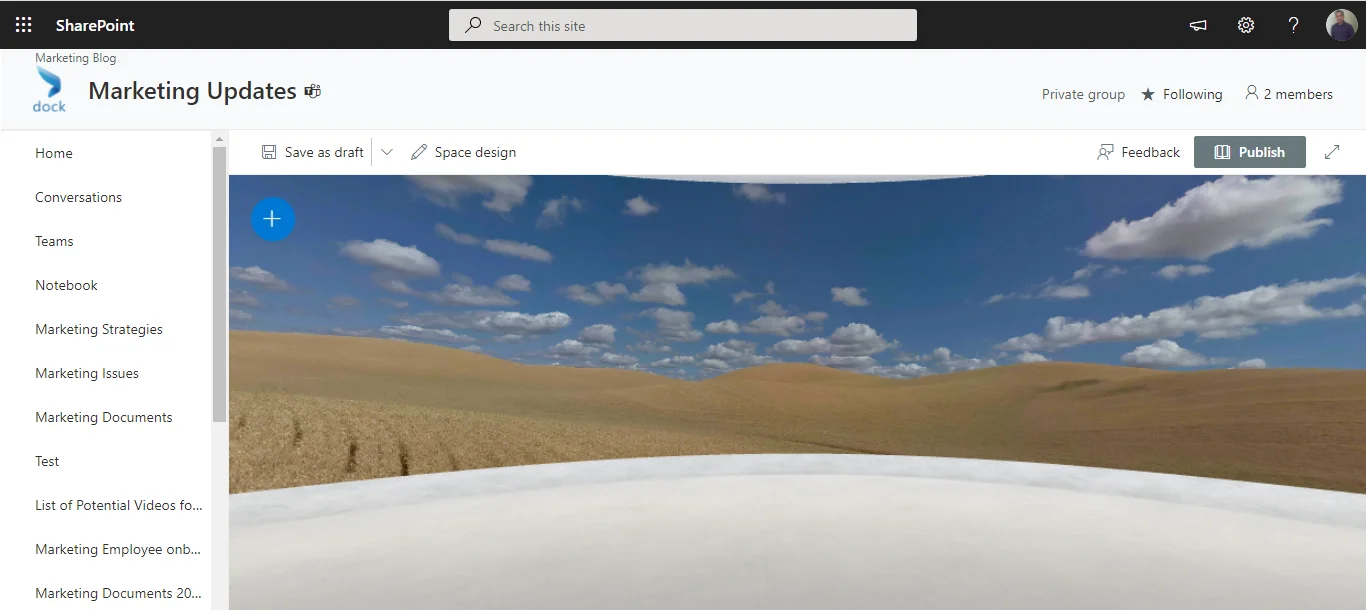
- Click the blue + button to add suitable images, videos, and other objects.
- Choose the desired web parts and add desired content.
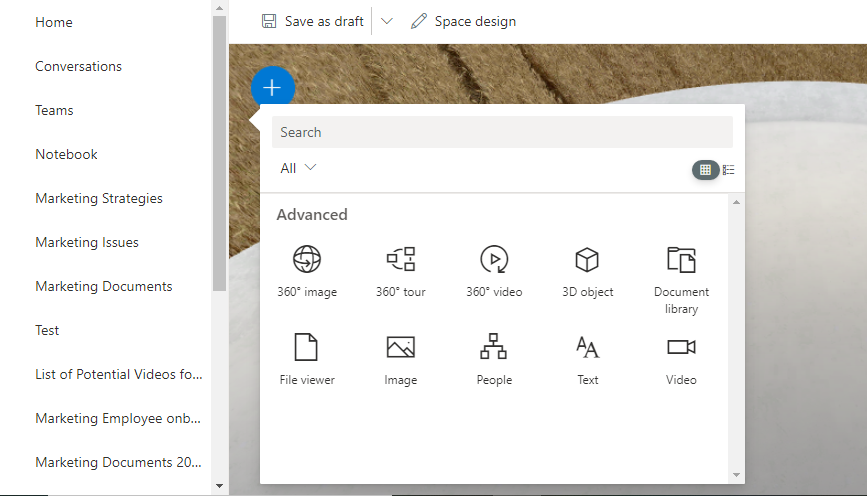
- We have added a few 3D object web parts for a demo here.
- Click on the Space design option from the top to edit the structure, theme, background image, welcome message, and ambient sound of the Space.
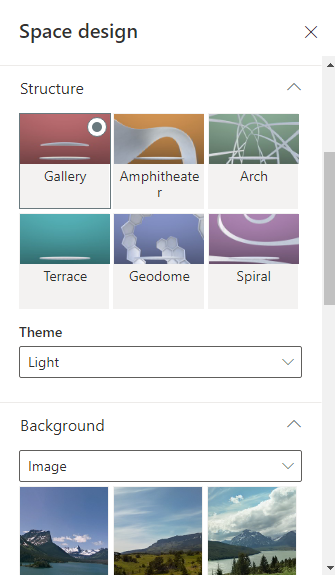
- You can also adjust the volume of the audio.
- Click Publish once you have completed your Space.
- In the case of publishing a new SharePoint page, you will be instantly prompted with various sharing options.
I've created a SharePoint Space. Now what?
After creating a Space, it's crucial to consider how to optimize the user experience. For example, consider the various scenarios where your SharePoint Space will be used. All the features included in SharePoint Spaces are excellent for presenting ideas with 3D models, 360° images, and videos. In this manner, you enhance communication by vividly expressing your ideas and vision to your employees and co-workers.
As virtual meetings and online events have grown in popularity, SharePoint Spaces is an excellent tool you can leverage to keep up with the demands of the online working environment. While it may take a considerable amount of planning and creativity to use these features to their full potential, it can certainly benefit your organizational communication.