

The events you plan and execute as part of your business are critical. Whether it's marketing, internal processes, or other celebrations, it's important to let everyone know about each event to ensure that the right people are aware of everything happening in your organization.
With a Microsoft 365 subscription, there are plenty of ways to schedule, invite, and highlight events within the Microsoft 365 environment. SharePoint offers unique features that additionally help in event planning. Let's discuss how to use the Events web part in SharePoint Online.
Uses Of Events Web Part
The best thing about the SharePoint Online Events web part is how you can add, edit, and showcase events neatly on your SharePoint pages. You can display events on the website and let users go to the event link or landing page easily for further actions.
You can also choose from different display options, such as the Filmstrip or Compact view. Moreover, the events can be assigned with a featured image that will be displayed in the events section. This helps to create a unique identity for each event.
How to Add the Web Part to a Page
To add the Events web part to a SharePoint page, you will follow similar steps to when you add other web parts. Complete the following steps below:
- Go to the SharePoint page that you would like to add the web part
- Click Edit from the top right of the page to enter edit mode
- Click the + icon that appears when hovering your mouse over the bottom of existing web parts or the top/bottom of each section
- Choose the Events web part from the window that opens
Now that you have added the web part to the page, the next step is to configure the web part the way you want it to show events. Follow the steps below:
- Click on the Edit icon next to the left side of the web part
- First, set the Source for your events
- You can either choose from an events list or sites
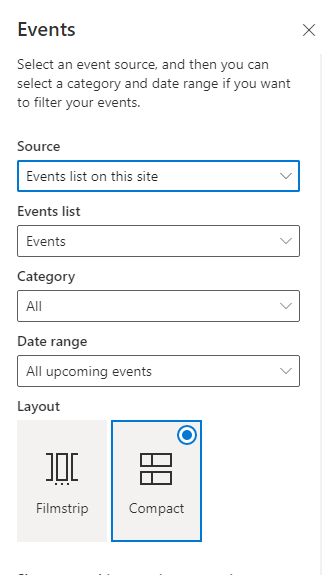
- If you choose Select sites, you can search for a site or choose from frequently visited sites you have accessed
- If you have lists based on categories, you can use it to filter events based on categories
- From the Date range drop-down list, you can choose how you would like to filter the events
- Select either Filmstrip or Compact layout according to your desire.
- You can also decide how many events to show at a time by entering the desired number in the text field provided at the bottom
- Republish the page by clicking Republish
How to Add Events to The Site Using the Web Part
You have now successfully added the Events web part to your SharePoint page. Now, let's add new events to the web part.
- Click Add event
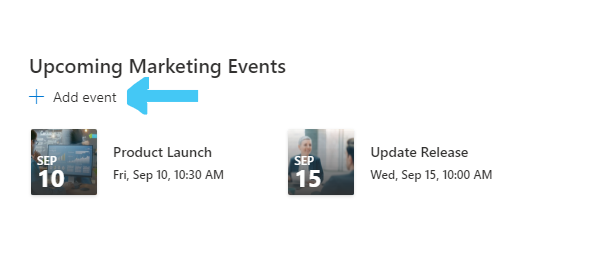
- You will be taken to a page where you can add details like Featured image, name of the event, date, place, link, and category
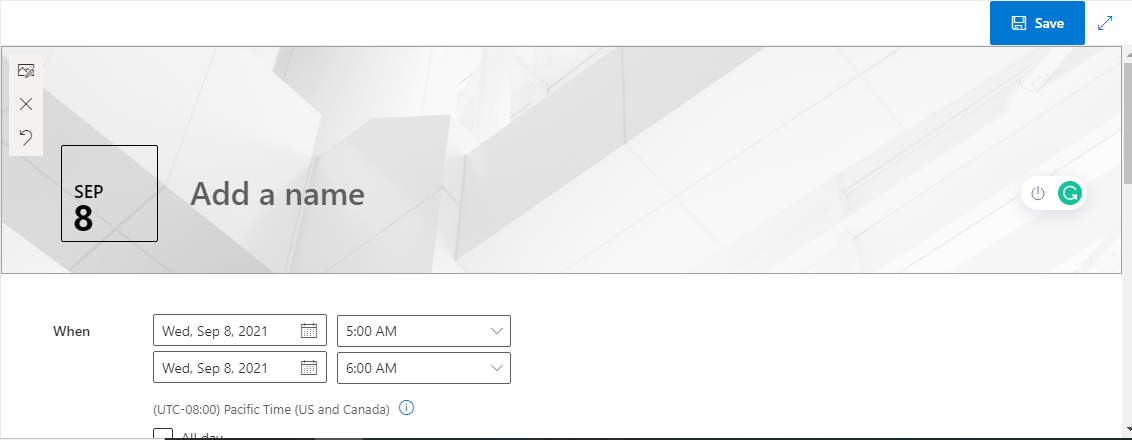
- You can also add a description to the event with relevant links and users (guests, hosts, speakers, etc.) to the event
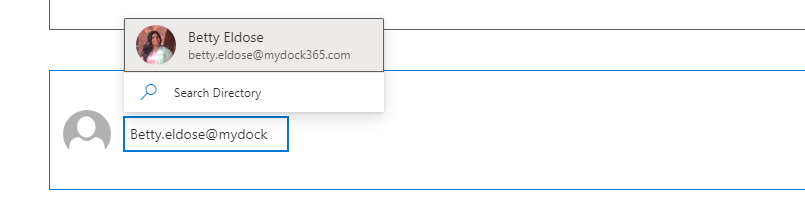
- When complete, click Save
How to Edit an Event
To edit an existing event, complete the following steps:
- Click the event and go to the event's page
- Click Edit and make changes to the fields you'd like to change
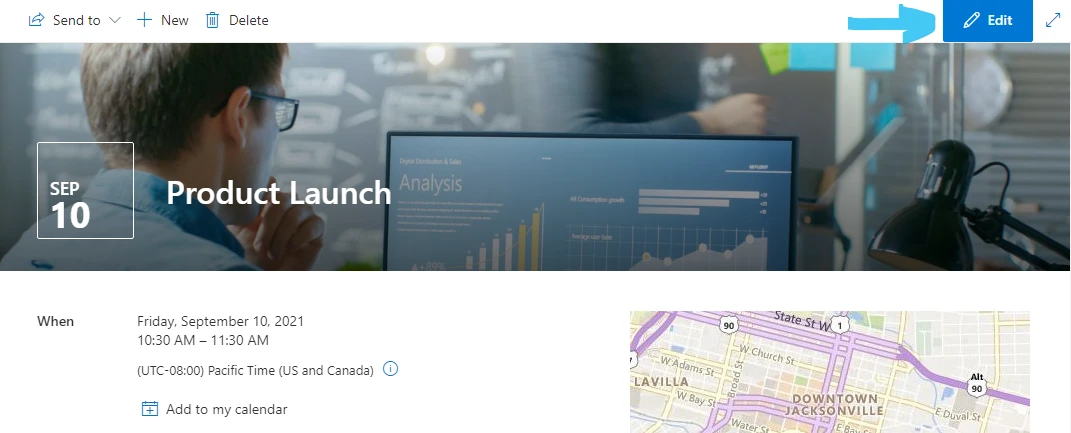
- Similar to above, you can edit all fields (including the featured image and event name)
- Click Save when complete
This is how you can utilize the Events web part to display your events on a SharePoint page. There are several additional ways to promote and showcase events within the abundantly user-friendly Microsoft 365 environment. Try these SharePoint Online Events web parts on your sites and let us know if you have any interesting thoughts!